Key Takeaways
- Winter offers the brightest constellations and clearest skies of the year
- Dress in multiple layers and bring chemical hand warmers for comfort
- Start with easy-to-find constellations like Orion as your celestial roadmap
📑 Table of Contents
Winter offers some of the most spectacular stargazing opportunities of the year. The crisp, clear air, longer nights, and brilliant constellations make it an ideal season for amateur astronomers - once you know how to stay warm!
This comprehensive guide will help you make the most of winter stargazing, from staying comfortable in the cold to identifying the season's most impressive celestial sights.
Why Winter is Excellent for Stargazing
While many people associate stargazing with warm summer nights, winter actually offers superior conditions for observing the night sky.
Clearer, Crisper Skies
Cold winter air holds less moisture than warm summer air. This means:
- Less atmospheric distortion - stars appear sharper and steadier
- Reduced humidity - clearer views, especially near the horizon
- Less haze - you can see fainter objects more easily
Longer Nights
Winter nights in the Northern Hemisphere can last 14-16 hours, giving you much more observing time compared to summer's short nights. You can start observing as early as 6 PM and continue well past midnight.
The Brightest Constellations
Winter is home to some of the most spectacular constellations in the entire night sky:
- Orion the Hunter - featuring bright stars and the famous Orion Nebula
- Canis Major - containing Sirius, the brightest star in the night sky
- Taurus the Bull - with the stunning Pleiades star cluster
- Gemini the Twins - with its distinctive parallel stars
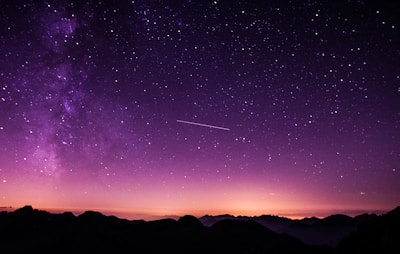
The Winter Milky Way
While not as prominent as summer's Milky Way, the winter Milky Way still offers beautiful views, especially from dark sky locations.
Staying Warm and Comfortable
The biggest challenge of winter stargazing is staying warm. Unlike hiking or skiing, stargazing means standing relatively still in the cold for extended periods. Here's how to stay comfortable:
Clothing Strategy: Layer, Layer, Layer
Base Layer (closest to skin):
- Thermal underwear (top and bottom)
- Merino wool or synthetic moisture-wicking material
- Avoid cotton - it absorbs moisture and makes you cold
Middle Layer (insulation):
- Fleece jacket or pullover
- Insulated vest
- Wool sweater
Outer Layer (wind and weather protection):
- Down or synthetic insulated jacket
- Windproof and waterproof if possible
- Should be oversized to fit comfortably over other layers
Extremities Are Critical
Feet:
- Insulated winter boots (rated for at least -10°C / 14°F)
- Two pairs of socks: thin liner socks + thick wool socks
- Toe warmers (chemical heat packs) for very cold nights
Hands:
- Thin liner gloves + thick insulated mittens (mittens are warmer than gloves)
- Hand warmers in mitten pockets
- Fingerless "astronomy gloves" for precise telescope work
Head and Neck:
- Warm hat or beanie (you lose significant heat through your head)
- Balaclava or neck gaiter for very cold nights
- Scarf to protect your neck
Additional Comfort Items
- Sleeping bag or blanket - wrap yourself while observing
- Insulated sitting pad - if you plan to sit or lie down
- Thermos with hot drinks - tea, coffee, or hot chocolate
- Snacks - high-energy foods help your body generate heat
- Chemical hand and foot warmers - absolute game-changers for comfort
Pro Tip: Overprepare
It's much better to bring extra layers and not need them than to cut your observing session short because you're freezing. You can always remove layers if you get too warm.
Getting Started: What You'll Need
The beauty of stargazing is that you can start with minimal equipment and gradually build your kit.
Essential (Free/Minimal Cost)
Your Eyes
- All you truly need to begin
- Allow 20-30 minutes for dark adaptation
- Avoid bright lights before and during observing
Red Flashlight
- Preserves your night vision
- Make your own by covering a regular flashlight with red cellophane
- Or use your smartphone's screen dimmed to lowest setting with a red filter app
Star Chart or App
- Print a free star chart for the current month
- Free apps: Stellarium (mobile), Star Walk, SkySafari
- These show you what's currently visible from your location
Recommended (Moderate Cost)
Binoculars
- 7x50 or 10x50 specifications ideal for astronomy
- Dramatically enhance your views of star clusters, nebulae, and the Moon
- Much more affordable than telescopes
- Budget: £50-150
Reclining Chair
- Lawn chair or zero-gravity chair
- Looking straight up for extended periods is uncomfortable
- Your neck will thank you
Planisphere (Rotating Star Chart)
- Mechanical, rotating disk showing the night sky
- Set it to your date and time - shows exactly what's visible
- Never needs batteries
- Cost: £10-20
Key Winter Constellations
Let's explore the major constellations visible on winter evenings. I'll describe how to find each one, starting with the easiest.
Orion the Hunter 🏹 (Your Starting Point)
Why start here: Orion is the most recognizable constellation in the winter sky and serves as your roadmap to finding everything else.
How to find it:
- Look south (in the Northern Hemisphere)
- Find three bright stars in a short, straight line - this is Orion's Belt
- Above the belt: two bright stars (Orion's shoulders - Betelgeuse and Bellatrix)
- Below the belt: two more bright stars (Orion's knees - Rigel and Saiph)
Notable features:
- Betelgeuse (shoulder) - red supergiant star, one of the largest known stars
- Rigel (knee) - brilliant blue-white star, extremely luminous
- Orion Nebula (below the belt) - stellar nursery visible to naked eye as a fuzzy patch, spectacular in binoculars
Canis Major (The Great Dog) 🐕
How to find it:
- Start at Orion's Belt
- Draw an imaginary line downward and to the left (southeast)
- You'll hit the brightest star in the night sky: Sirius
Notable features:
- Sirius - magnitude -1.46, appears to twinkle with multiple colours due to atmospheric refraction
- Often called the "Dog Star"
Taurus the Bull 🐂
How to find it:
- Start at Orion
- Look above and to the right (northwest)
- Find a V-shaped pattern of stars - this is the bull's face (the Hyades cluster)
- The bright orange star in the V is Aldebaran (the bull's eye)
Notable features:
- Aldebaran - orange giant star
- Pleiades (M45) - stunning open star cluster, looks like a tiny dipper, contains hundreds of stars
- Visible to naked eye as a fuzzy group; binoculars reveal individual stars beautifully
Gemini the Twins 👯
How to find it:
- Start at Orion
- Look above and to the left (northeast)
- Find two bright stars side-by-side - these are the "twin" stars Castor and Pollux
Notable features:
- Castor and Pollux - the heads of the twins
- Good constellation for finding deep sky objects with binoculars
Auriga the Charioteer 🌟
How to find it:
- Almost directly above Orion
- Pentagon shape
- Contains the bright star Capella
Notable features:
- Capella - sixth brightest star in the night sky
- Several nice star clusters for binocular viewing
Deep Sky Objects for Beginners
"Deep sky objects" refers to anything beyond our solar system: nebulae, star clusters, and galaxies. Here are winter's best for beginners:
1. Orion Nebula (M42) ⭐⭐⭐⭐⭐
Difficulty: Very Easy (visible to naked eye)
What it is: A massive stellar nursery where new stars are being born
How to find it:
- Look just below Orion's Belt
- Appears as a fuzzy "star" to the naked eye
- Three stars in a vertical line (Orion's Sword) - the middle "star" is the nebula
What you'll see:
- Naked eye: Fuzzy patch
- Binoculars: Cloud-like nebula structure
- Telescope: Intricate detail, multiple stars embedded in glowing gas
2. Pleiades (M45) ⭐⭐⭐⭐⭐
Difficulty: Very Easy (visible to naked eye)
What it is: Open star cluster containing hundreds of young, hot stars
How to find it:
- In Taurus constellation
- Looks like a tiny dipper or fuzzy patch to the naked eye
- Above and to the right of Orion
What you'll see:
- Naked eye: 6-7 stars in a tight group
- Binoculars: Dozens of blue-white stars, absolutely stunning
- Best viewed with binoculars - telescopes often have too much magnification
3. Hyades Cluster ⭐⭐⭐⭐
Difficulty: Easy (visible to naked eye)
What it is: Open star cluster forming the V-shape of Taurus's face
How to find it:
- The V-shaped pattern in Taurus
- Aldebaran is not part of the cluster (it's a foreground star)
What you'll see:
- Naked eye: Obvious V-pattern
- Binoculars: Individual stars clearly resolved
4. Beehive Cluster (M44) ⭐⭐⭐
Difficulty: Moderate (binoculars recommended)
What it is: Large open star cluster in Cancer
How to find it:
- Between Gemini and Leo
- Appears as a fuzzy patch to naked eye from dark sites
- Best with binoculars
What you'll see:
- Binoculars: Dozens of stars forming a cloud-like cluster
- One of the best binocular objects in the winter sky
Essential Stargazing Tips
1. Give Your Eyes Time to Adjust 👁️
Your eyes need 20-30 minutes to fully adapt to darkness. During this time:
- Avoid looking at phone screens (use red light mode if you must)
- Don't look at car headlights or streetlights
- The longer you wait, the more you'll see
2. Avoid Light Pollution 💡
Get away from city lights for the best views:
- Even 20-30 minutes' drive from a city makes a huge difference
- Use dark sky maps to find the darkest locations near you
- Higher elevations can help you get above local light domes
3. Check the Moon Phase 🌙
The Moon is beautiful, but its brightness washes out faint stars and deep sky objects:
- New Moon (best): Darkest skies, ideal for faint objects
- First/Last Quarter: Moon sets/rises partway through night
- Full Moon (avoid): Bright moonlight drowns out faint objects
4. Use Averted Vision 👀
For faint objects, don't look directly at them:
- Look slightly to the side
- Your peripheral vision is more sensitive to faint light
- The object will appear brighter when not looking directly at it
5. Start Simple 🎯
Don't try to find everything in one night:
- Master the easy constellations first (Orion, Canis Major)
- Use these as stepping stones to find other objects
- Build your knowledge gradually
6. Join Others 👥
Consider joining a local astronomy club:
- Experienced members can show you the ropes
- Access to various telescopes
- Star parties are fantastic learning opportunities
- Social aspect makes cold winter nights more enjoyable
7. Keep Records 📝
Document your observations:
- Date, time, location, weather conditions
- What you observed
- Sketches of what you saw
- This helps you track your progress and plan future sessions
Conclusion
Winter stargazing rewards those willing to brave the cold with some of the year's most spectacular celestial views. With proper preparation, the right mindset, and this guide, you'll be well-equipped to explore the winter night sky.
Remember the keys to success:
- Stay warm - layer up and use hand warmers
- Start with Orion - your roadmap to the winter sky
- Give your eyes time - 20-30 minutes for full dark adaptation
- Be patient - learning the sky takes time, and that's part of the fun
Clear skies, and enjoy your winter stargazing adventures!
Winter Stargazing Checklist
Print this checklist for your next winter observing session:
Clothing:
- [ ] Thermal base layers
- [ ] Multiple insulating layers
- [ ] Insulated outer jacket
- [ ] Winter boots
- [ ] Warm hat
- [ ] Gloves/mittens
- [ ] Scarf or neck gaiter
Equipment:
- [ ] Red flashlight
- [ ] Star chart or app
- [ ] Binoculars (optional)
- [ ] Reclining chair
- [ ] Blanket or sleeping bag
Comfort:
- [ ] Hand warmers
- [ ] Foot warmers
- [ ] Thermos with hot drinks
- [ ] Snacks
- [ ] Extra layers (just in case)
Preparation:
- [ ] Check weather forecast
- [ ] Check moon phase
- [ ] Plan your observing targets
- [ ] Allow 20-30 minutes for dark adaptation
Ready to explore more of the night sky? Check out our guide on Observing Mercury or learn about Moon Phases.